Signals |
Abergavenny |
Abergele |
Banbury |
Birmingham NS |
Bognor |
Brereton Sdgs |
Cambrian |
Craven Arms |
Droitwich Spa |
Exeter |
Gobowen |
GW(S)R |
Helsby |
High Wycombe |
Kidderminster |
Ledbury |
Lincoln |
Llandudno |
London |
Malvern Wells |
Moreton-in-Marsh |
New Cumnock |
Newton Abbot |
Pontrilas |
Rhyl |
Shrewsbury |
S Wales |
St Albans S |
Taunton |
Warrington |
Woofferton Jct |
Worcester |
Wrexham |
Yeovil |
West Midlands |
Home Signal page |
SRS |
Exeter West Group
Lincoln index |
Area map |
Boultham Jct |
East Holmes |
High St |
Pelham St Jct |
St Marks |
West Holmes
March 83
St Marks Station signalbox controlled the south-western end of the station, and access
to a pair of sidings located between the running lines.
The distants belonged to Lincoln West, the next box towards Newark.
|
 |
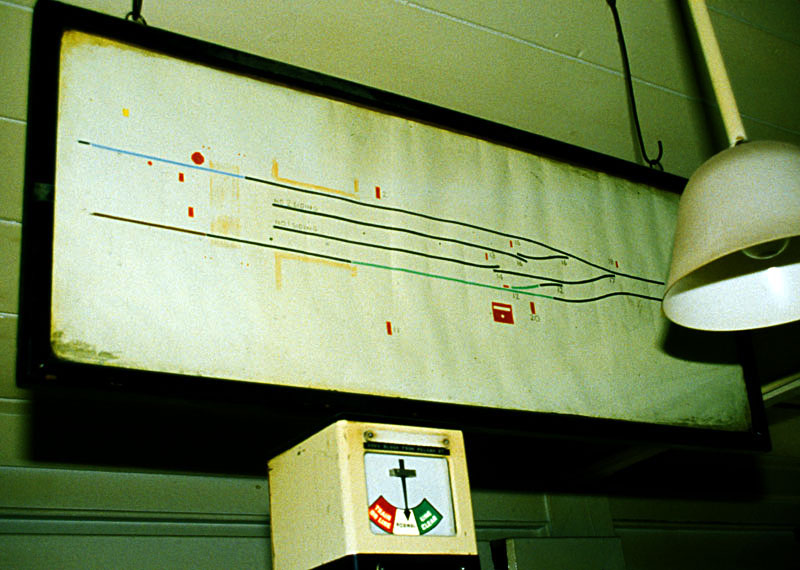 |
The signalbox diagram, much more basic than the ones in the other boxes.
Below it is the top of the BR block instrument to
Pelham Street Jct.
|
| The block instruments for the sections to Lincoln West.
|
 |
 |
This economical facing point lock was in use almost directly below the signalbox.
These are no 12 points, over which trains reversing from the down platform had to travel from left to right.
Normally, a separate lever is used to control the lock associated with a facing point. This mechanism
allows both point and lock to be controlled from a single lever - hence the term "economical".
|
Lincoln index |
Area map |
Boultham Jct |
East Holmes |
High St |
Pelham St Jct |
St Marks |
West Holmes
Signals |
Abergavenny |
Abergele |
Banbury |
Birmingham NS |
Bognor |
Brereton Sdgs |
Cambrian |
Craven Arms |
Droitwich Spa |
Exeter |
Gobowen |
GW(S)R |
Helsby |
High Wycombe |
Kidderminster |
Ledbury |
Lincoln |
Llandudno |
London |
Malvern Wells |
Moreton-in-Marsh |
New Cumnock |
Newton Abbot |
Pontrilas |
Rhyl |
Shrewsbury |
S Wales |
St Albans S |
Taunton |
Warrington |
Woofferton Jct |
Worcester |
Wrexham |
Yeovil |
West Midlands |
Home Signal page |
SRS |
Exeter West Group

